fan club

Showing posts with label crafties. Show all posts

Saturday, October 8, 2011

nifty notebook

Well in case you haven't noticed, school is in full swing! And for his homework journal, Parker was given a plain composition notebook.

no. we don't do that here.
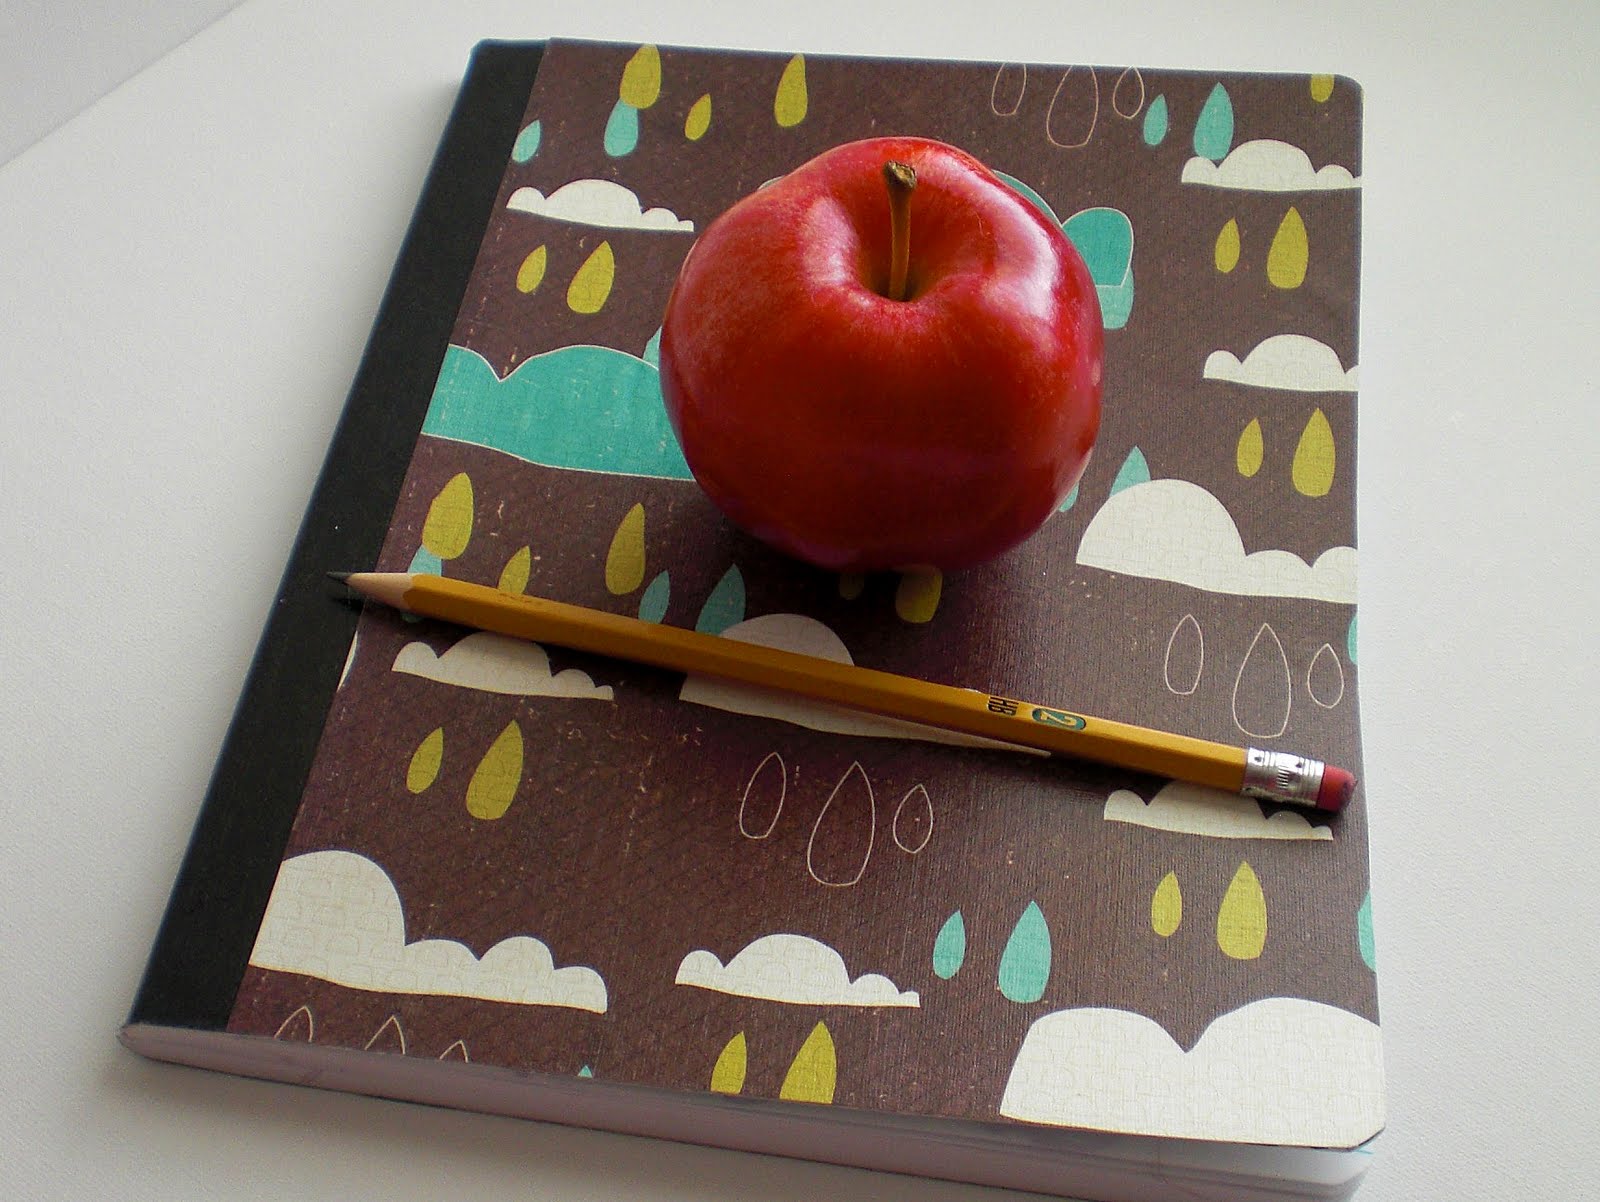
so i dressed it up. It goes really quickly {if you are not trying to photo journal it} and you can do a bunch at once. Did someone say teacher gifts for Christmas? Yes. I think I did!


You will need:
a boring, ugly composition notebook
two sheets of scrapbook paper
{one for the front, one for the back}
Mod Podge
a foam brush
a scraper or squeegee of some kind
and {not pictured} painter's tape


Place the notebook right side up. Place your scrapbook paper - also right side up - on top of the cover and butt the edge up to the spine. Secure with a strip of tape.


Open the front cover of the notebook. Now your paper should be right side down with the front cover on top of it. Trace around the edge of the notebook onto the paper.


Carefully remove the tape and cut out the paper just inside the tracing lines.


Open the notebook and lie it on a work surface, spine up. Move all the pages to rest behind the back cover for now. At this point I like to cover my work surface with newspaper or something.
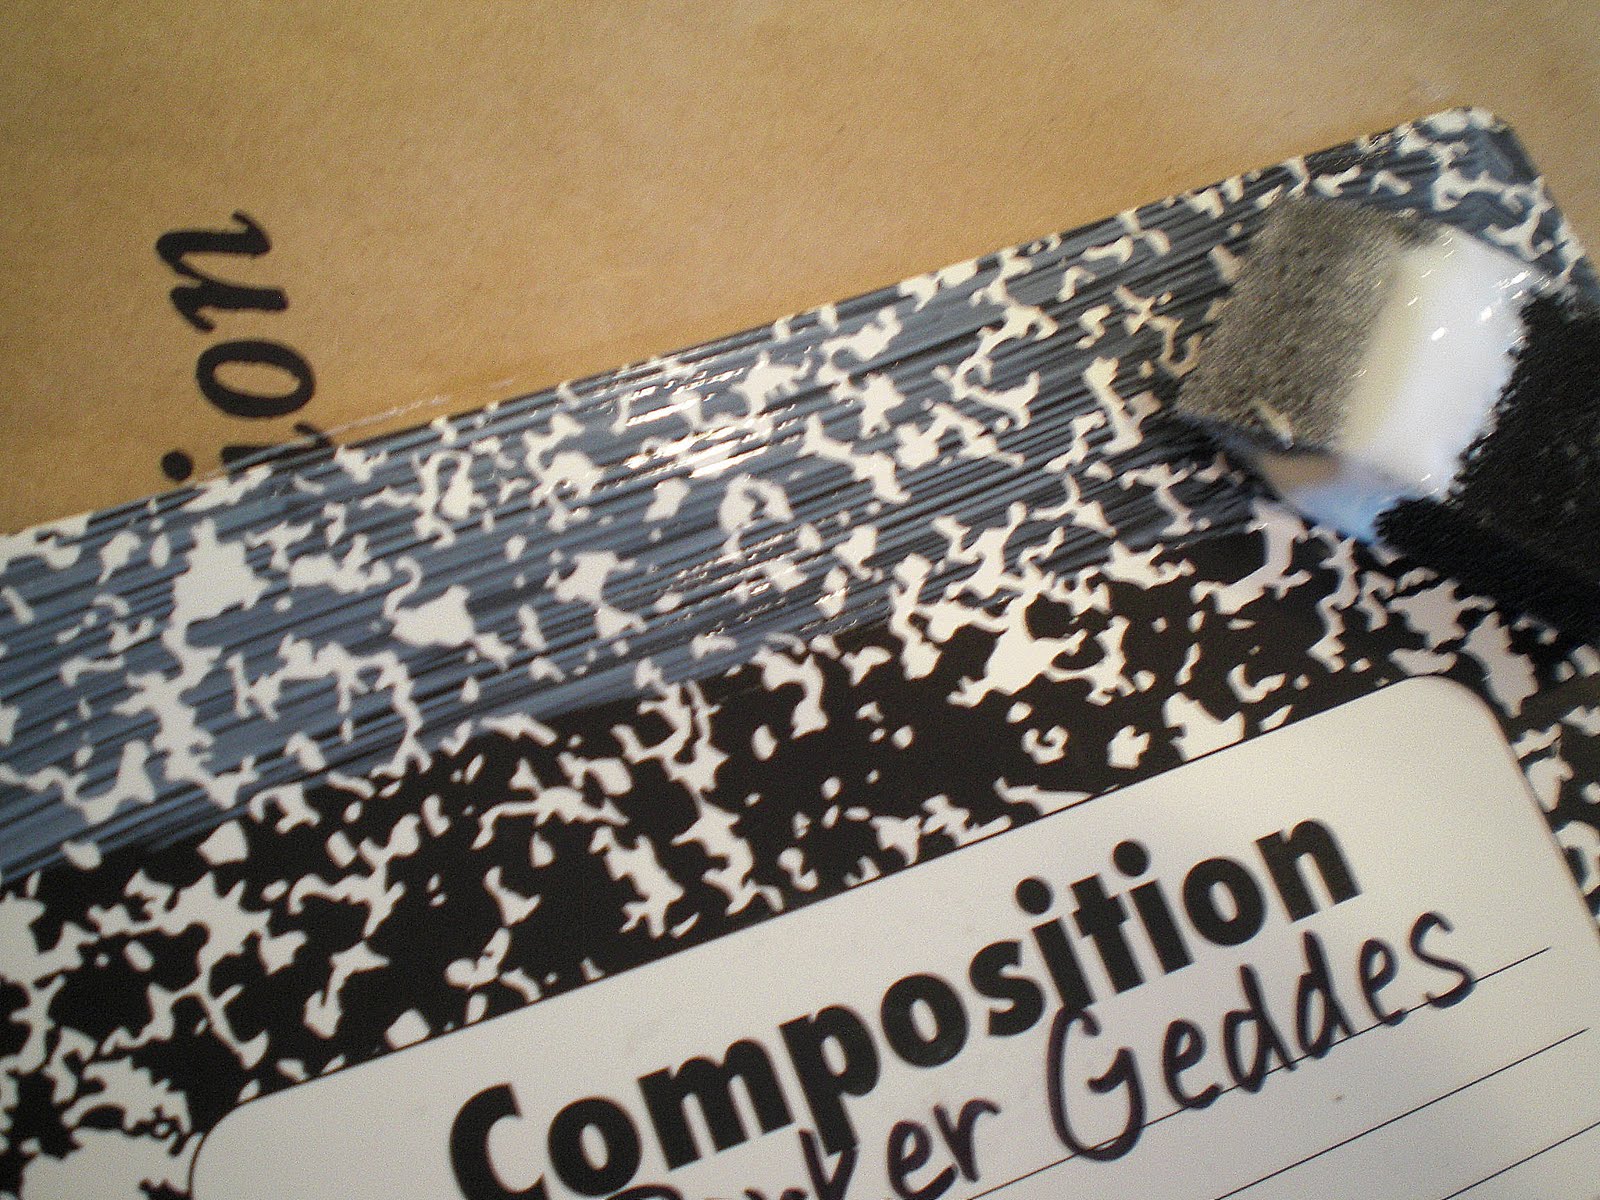

Using your foam brush, apply a moderate strip of mod podge to the top edge of the front cover. Careful not to apply to liberally or will creep over the edges. Too thin, and you won't have good adhesion.


Now align your scrapbook paper -still right side up - with the top edge of your cover. Do a quick smooth over with your hand.


Working from the top to bottom, one section at a time, apply a strip of mod podge and then smooth the paper down over it until the whole cover is, well . . . covered.

Now get out your squeegee and smooth out any bumps. {i picked mine up at a craft store for a couple of bucks and i use it for everything!} don't press too hard - you could tear the paper. and i like to keep a damp paper towel handy to wipe any excess glue off my squeegee as i go.


Turn your cover over and trim off any excess paper.

Turn the cover back over and apply a thin even layer of mod podge to seal it. i find if there are any small bumps at this point they usually smooth out as your paper dries. use can also layer a label or embellishment once it's dry and do a second coat of mod podge over it.

Allow to dry completely before you do the back cover.

There! much more fitting for a disaster boy. i couldn't find any tornado or lightning bolt paper though, which is weird because natural disasters are synonymous with scrapbooking. o well. he loves it.

Tuesday, September 27, 2011

Lacey Headbands

I realize it doesn't take a rocket scientist to figure out how to make a headband. But I flatter myself to think that maybe someone out there could use my own tips for the pretty pretty head candy.

First start with an arsenal of lace and ribbons. I feel this is something one should have on hand at all times. Like you would milk or toilet paper. Press them with an iron on medium heat. You may also want some other tools like Fray Check, Horsehair braid, pins and a hot glue gun.


Cut the ribbon. I cut two main pieces: a top piece {the feature} and a bottom piece {the worker}. Cut the top piece 9" long and the bottom piece 18" long. You can adjust these lengths depending on your head size if your worried about fit. I cut the 'feature' ends straight across and the 'worker' ends at an angle.


Now don't be worried if the ribbon you love is wired. After cutting to size, press on on the corners until you feel the poke of the wire end. Grasp the tip of wire and pull back the ribbon to expose it. {tweezers help a lot} When you've got more than an inch exposed, wrap it around your finger and yank!


After cutting your ribbon lengths, {and ridding yourself of that pesky wire} apply fray check to the ends and allow to dry.


Now have some fun layering laces and other edgings to the back of your 'feature' ribbon. Apply a thin ribbon of hot glue and place your lace so it will peek out when the 'feature' is flipped back over. Trim to fit after applying. I also use popsicle stick to press down the lace and spread out the glue while it's still hot so it's not lumpy when it dries. {what you have to eat to get that popsicle stick is totally up to you.}


Fold each of your ribbons in half {both the 'feature' and the 'worker'} and pin the center of each.


Layer the ribbons on top of each other, matching up the center pins. The 'feature' should be on bottom and the 'worker' should be on top. Make sure both ribbons are laying pretty side down. Then fold back one half of the 'worker', apply your hot glue to the back of the 'feature' and place the lifted half back down. Do your popsicle stick trick. Repeat on the other half.


Flip over to right side up. Glue a small strip of your lace over the edge to clean up the look. Trim to fit.


Another option is to wrap a thin ribbon around both the 'feature' and 'worker' and secure with glue in the back.


If you have a pretty lace that's perfect without edging, but is too delicate, horsehair braid will help. It's a flexible, woven, nylon braiding that is semi sheer. It comes in white or black and varying widths. It's woven on the diagonal so it's width can also change when pulled or pushed - think chinese finger trap.


If you are using horsehair braid, you will have to do a little hand sewing. Pin the braid to the back of your lace and stitch it on using matching thread and small stitches. Careful not to pull your thread too tight because it will pucker your lace. I don't recommend machine sewing for the same reason.

The end of horsehair is very pokey. Use a scrap of ribbon to fold over the ends of the 'feature' and glue to the front and back.


Your headbands are done now. And because they tie on to your head they look just as pretty from the back as they do the front. Tie a few onto a card and give as gift. They even look good enough to not wrap.


and then give them to that cute little pixie you know for her 30th birthday.


yup. adorable.

Tuesday, February 1, 2011

wishin and hopin and thinkin and prayin...

...plannin and dreamin your labor will start,
that won't get him into your arms.

well my due date came and went. and with the tiny of exception of some labor-like activity last sunday, this kid is staying put! i've done all that i can do! i've tried EVERYTHING. now it's time for my doctor to do all that he can do. that's right folks - i'm getting induced! next monday. but don't cry for me argentina. although i wanted a natural childbirth, it's not the end of my universe to go the tried and true pitocin + epidural route. i just want a healthy baby at the end of the day.

so in the meantime i've been doing all those decorating and sewing projects i didn't think i had time for. and shopping.

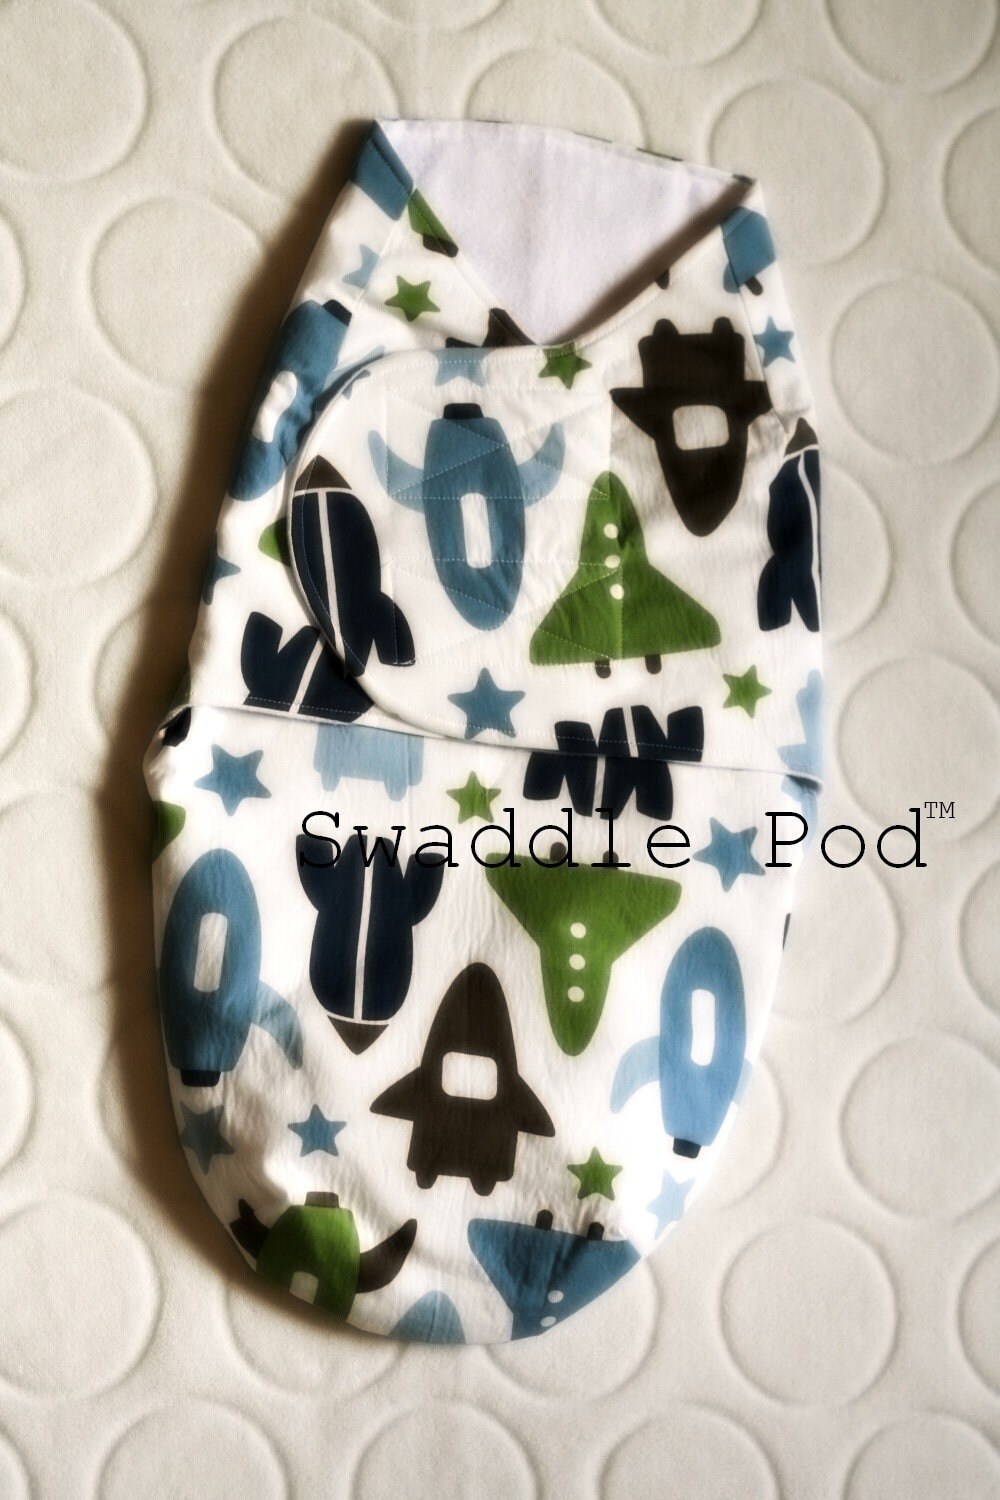
i am a big fan of swaddling my babies. and i'm in love with the new cotton - pod models that are on the market. I've shown this one from cozi-bug before. it's a touch pricey at $54.
this one is so darling with the dwell rockets. it's an etsy seller: maternalNest and is a little more affordable at $42.

But i wanted to make my own. It takes less than a yard of fabric each for outer and lining and then i could line with flannel. {most i've seen are lined with minky which is a dreamy fabric but in my opinion not ideal for swaddling since it's polyester.}
I found a great Kwik Sew pattern that i used to make these. {3734} it was very economical at $12. but i rounded the edges. it's cuter. like dumbo's ears when his mama wraps him up. try watching that movie and not bawling.

and if you still want cheaper than that, i found a free swaddler pattern at craft gossip. they are fun to make and surely would be a well received gift should you be attending a shower soon! Speaking of showers, mine is still on for saturday. unless my water breaks. but i'm not holding my breath. if you didn't get an invite - a thousand apologies. YOU ARE INVITED! email me and i will give you the details.

Thursday, December 16, 2010

silhouette applique tee

'tis the season to be sewing. i've almost finished making my Christmas projects and here is an easy one you can whip up for a quick gift.


it's fun for kids and adults and it can be as simple {beginners} or elaborate {sewing vets} as you want. you'll need:
-basic sewing supplies
-sewing machine, thread, and jersey machine needle {about size 80/12}
-glue stick
-blank tee shirt {pre-washed and pressed}
-jersey knit scrap* {also pre-washed and pressed}
-simple applique template

*jersey knit is basically t-shirt fabric. it's a little lighter in weight than other knits and comes in many prints and colors. if you find one that is particularly slinky you can beef it up by ironing on a light weight interfacing to the back.


1. cut out your template on the lines.
place it on your jersey scrap and trace with a water/air soluble fabric pen.


2. rough cut around your design leaving a generous border surrounding.


3. turn over and gently dab glue to the back
being careful to stay within the lines of your design.


4. place on your tee and smooth down scrap to adhere glue.
add a few pins to make it secure.


5. change your machine's needle to a jersey one. sew scrap to tee stitching directly on the lines.
it helps to start at the bottom of the tee with neck closest to you and turn the sleeves inside out.
be very careful not to tug or stretch while you sew - you don't want puckers.

6. i used a triple straight stitch which goes back over itself two more times.
this makes the stitching more visible, but you can also use a slightly heavier thread.
press again using stream.


7. trim fabric close to stitching leaving about a 1/8" border.
be oh-so-careful not to cut your shirt. you'll be so mad if you do.

8. voila! you are done. there is no need to finish the edges since knits don't fray.
depending on how wide of a border you left, the edges of the applique will just roll in the wash.
if the glue made your shirt a little stiff, that will come out in the wash too.


i've made a few for my boys featuring their latest obsessions. i can't wait for these to become their fave tees. i'll have to post pics after they open these beauties Christmas morning.

Friday, November 12, 2010

muchas gracias

saw this idea here and loved it. we did it for family night. it was cute to see what the boys were 'glad they had' as we put it to them. i drew my own leaf template but this is a good one too.


what are you thankful for?

Friday, October 29, 2010

witches be crafty!

I think my boys may be growing up with a model of the female homemaker that's disproportionate to, perhaps, what is more common. Every woman they know and care about is a wicked creatin' machine! I just hope their future wives are into it too or they might think something is wrong with them.

I'll admit I may go a tiny bit overboard sometimes. but hey - I'm not the only one!


festive pillow cases made by Grandma. {my mom}
they look adorable on the boys' orange polka dot sheets.

homemade eyeballs.
we grabbed a package or two of white ping pong balls from the dollar store,
added a few colored permanent markers and...

but none were cuter than the ones parker made.
great kids craft - he had so much fun he was giddy!

spooky broach.
hit the dollar store again for an assorted bag of plastic critters.
'paint' them with regular school glue and coat with glitter.
i did about two coats. when it's dry, attach a bar pin on the back with hot glue.
makes a fabulous party favor!
careful where you pin it though - this guy has roving hands!

spidey pillow.
I stitched mine with heavy white thread and my machine.
but you can achieve the same effect with fine yarn and hot glue.
the fairy god-mother of all glues.

poisoned apples.
grab the already made caramel apple dip {chocolate flavor} from the store and warm it up. Whisk some in a bowl with a teaspoon or two of boiling water to make it more runny.
add a drop of black food coloring and drizzle on top of apples.
then gently shake to make it creep down the sides. don't worry, it'll dry.
spooky. and tasty. spasty. or tooky?


trick -or- treat bag made by Nanna. {dan's mom}
I swear they didn't call each other.
they just happened to make their projects out of coordinating fabric.

Spider's nest cupcakes.
great for your next party.
these remind me of the book: the trouble with mom.
darling book! recommended read for the kiddos.
not just for Halloween either.